Checkout Configuration
After successfully activating your account on the Appcharge platform, the next step is configuring your domain settings through the Appcharge's dashboard. To initiate this process, follow the steps below:
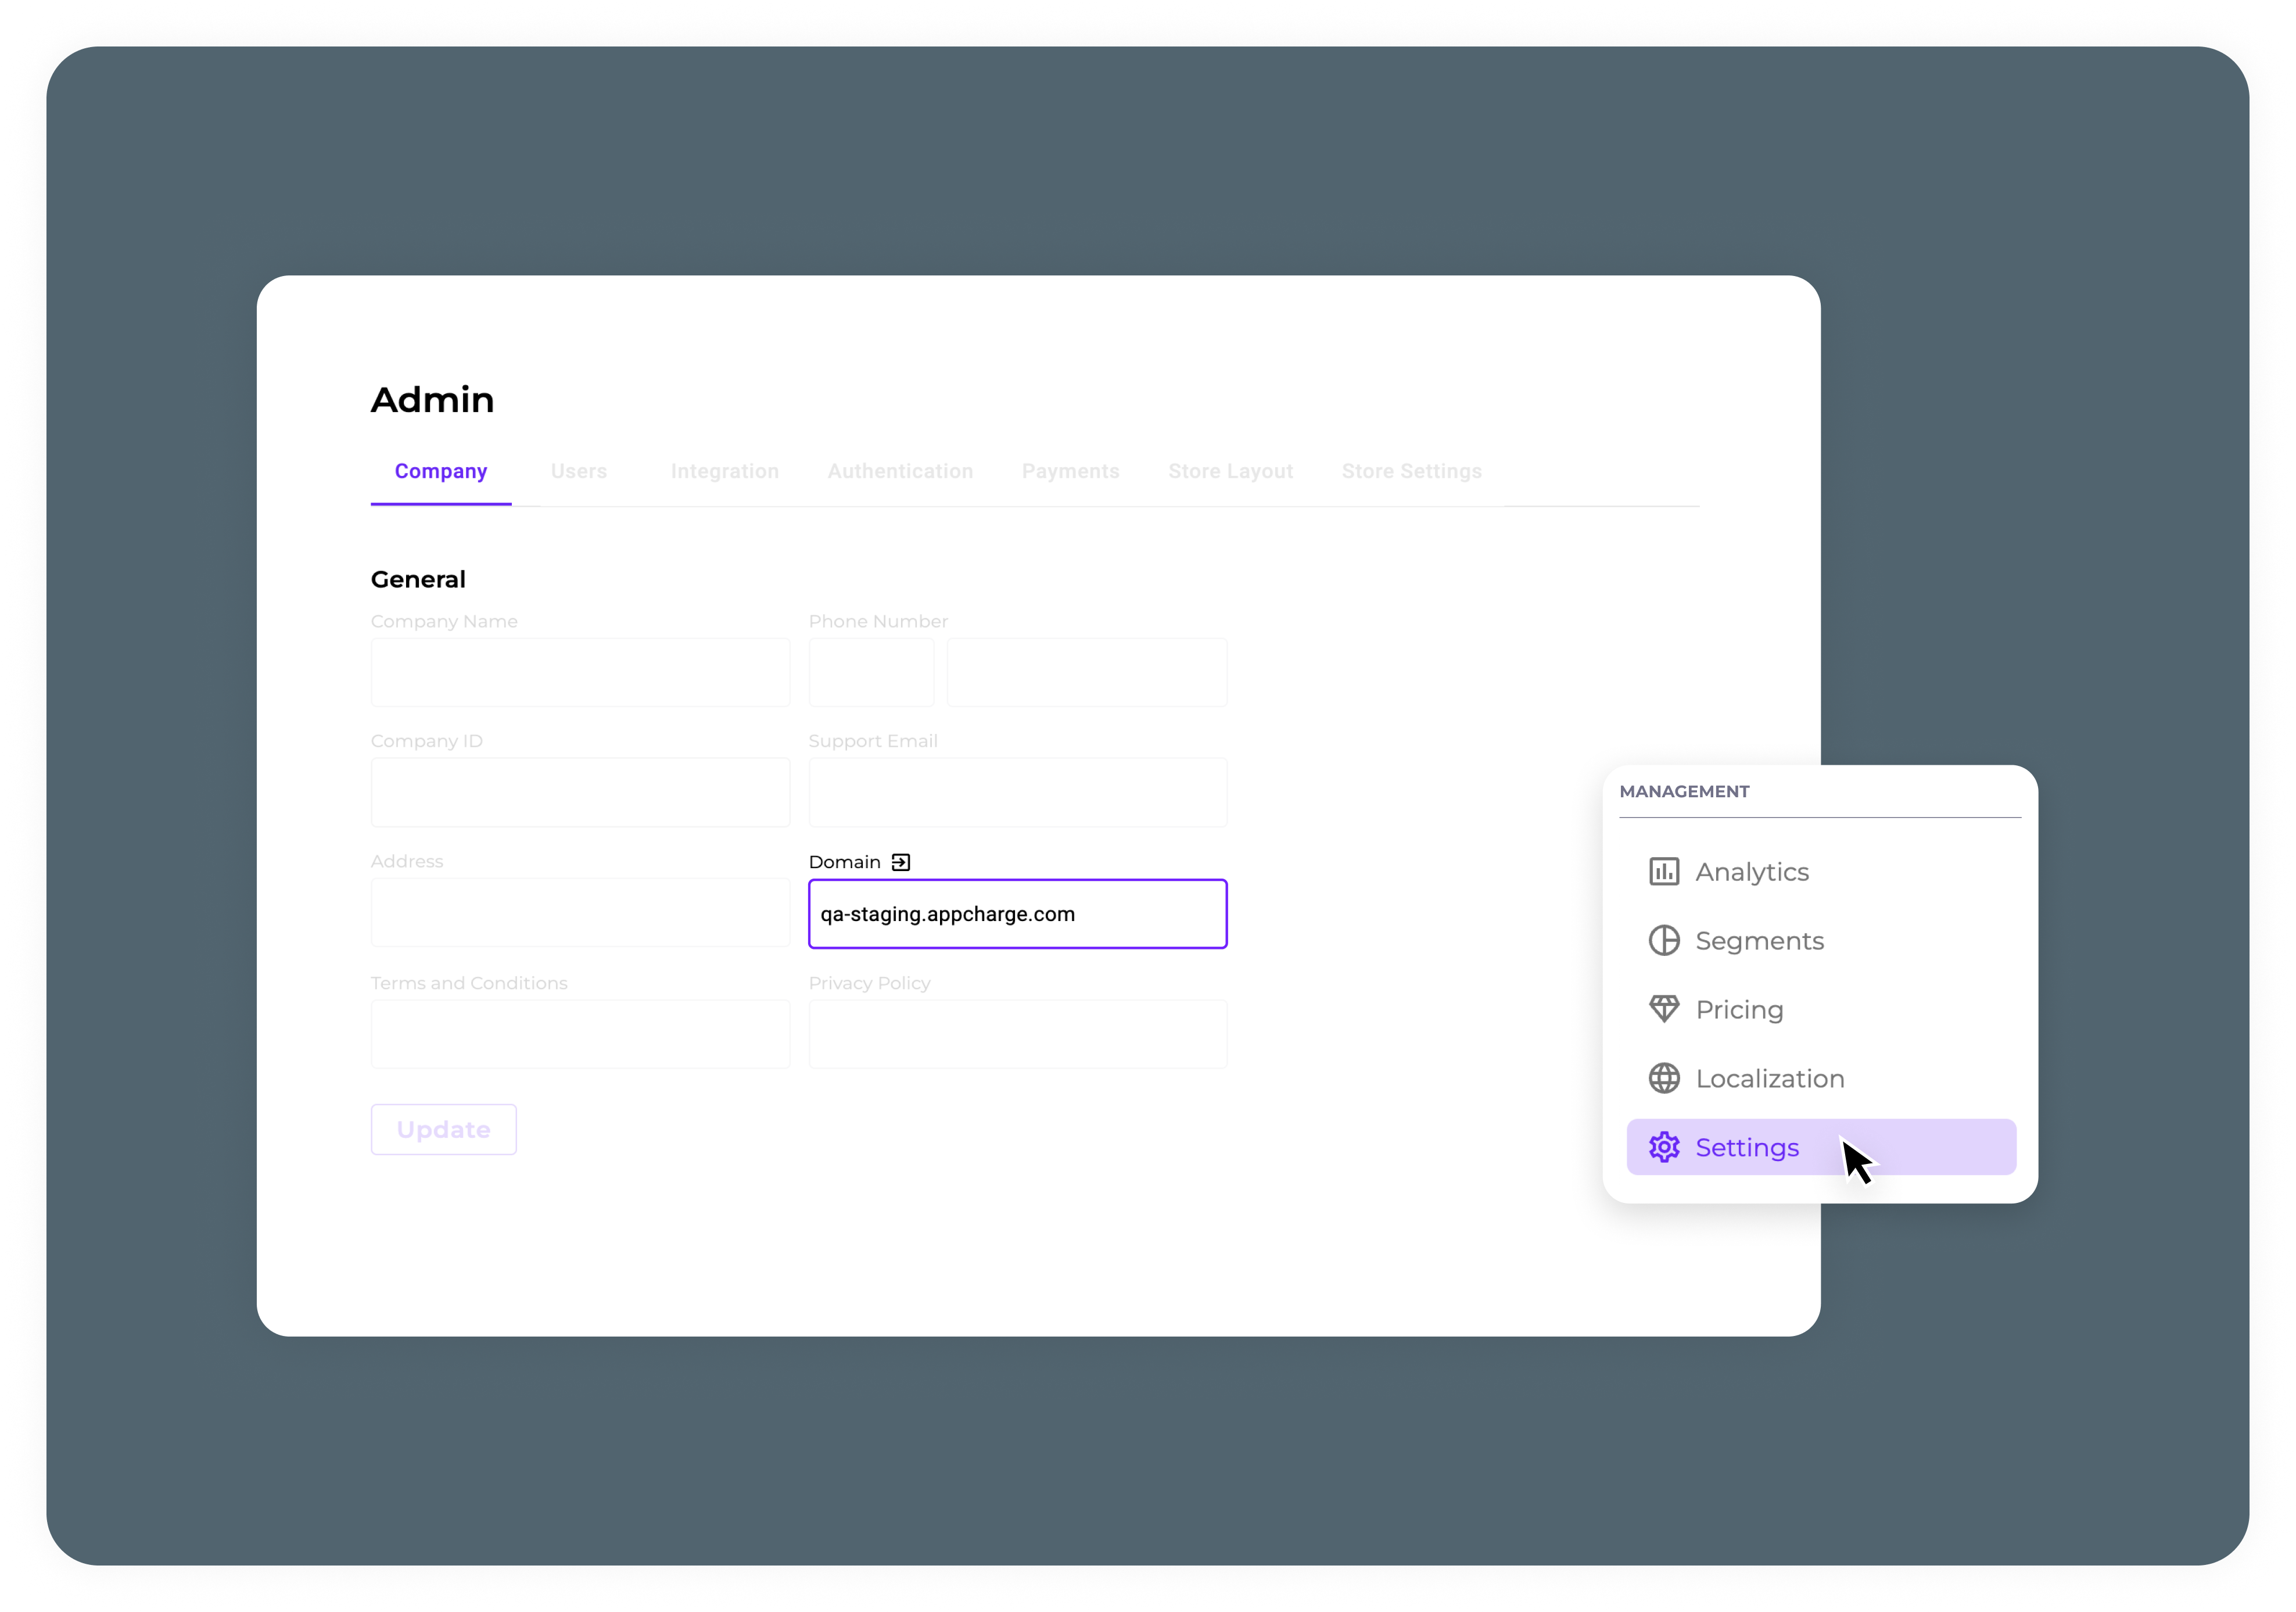
1. Domain settings:
- Navigate to the Dashboard:
Access the Appcharge dashboard by logging in to your account. - Access Admin Settings:
Once logged in to the dashboard, locate the Admin settings section. - Update your domain:
Within the Company tab, update your web store domain.
2. Webhooks setting:
- Navigate to the Dashboard:
Access the Appcharge dashboard by logging in to your account. - Access Integration Settings:
Once logged in to the dashboard, locate the Admin settings section, and click on the Integration tab. - Update Your Orders Reporting URL:
Click on the Integration tab to update your Orders Reporting API URL. For detailed instructions, refer to the documentation - Update Your Events Webhook URL:
Within Integration settings, update your Events Webhook (non-mandatory) URL. For detailed instructions, refer to the documentation
3. Customize your checkout:
- Navigate to the Dashboard:
Access the Appcharge dashboard by logging in to your account. - Access the Builder Tab:
Once logged in to the dashboard, locate the Builder tab. - Go to the Checkout Page:
Once in the Builder Tab, go to the Checkout Page to setup your Checkout design.
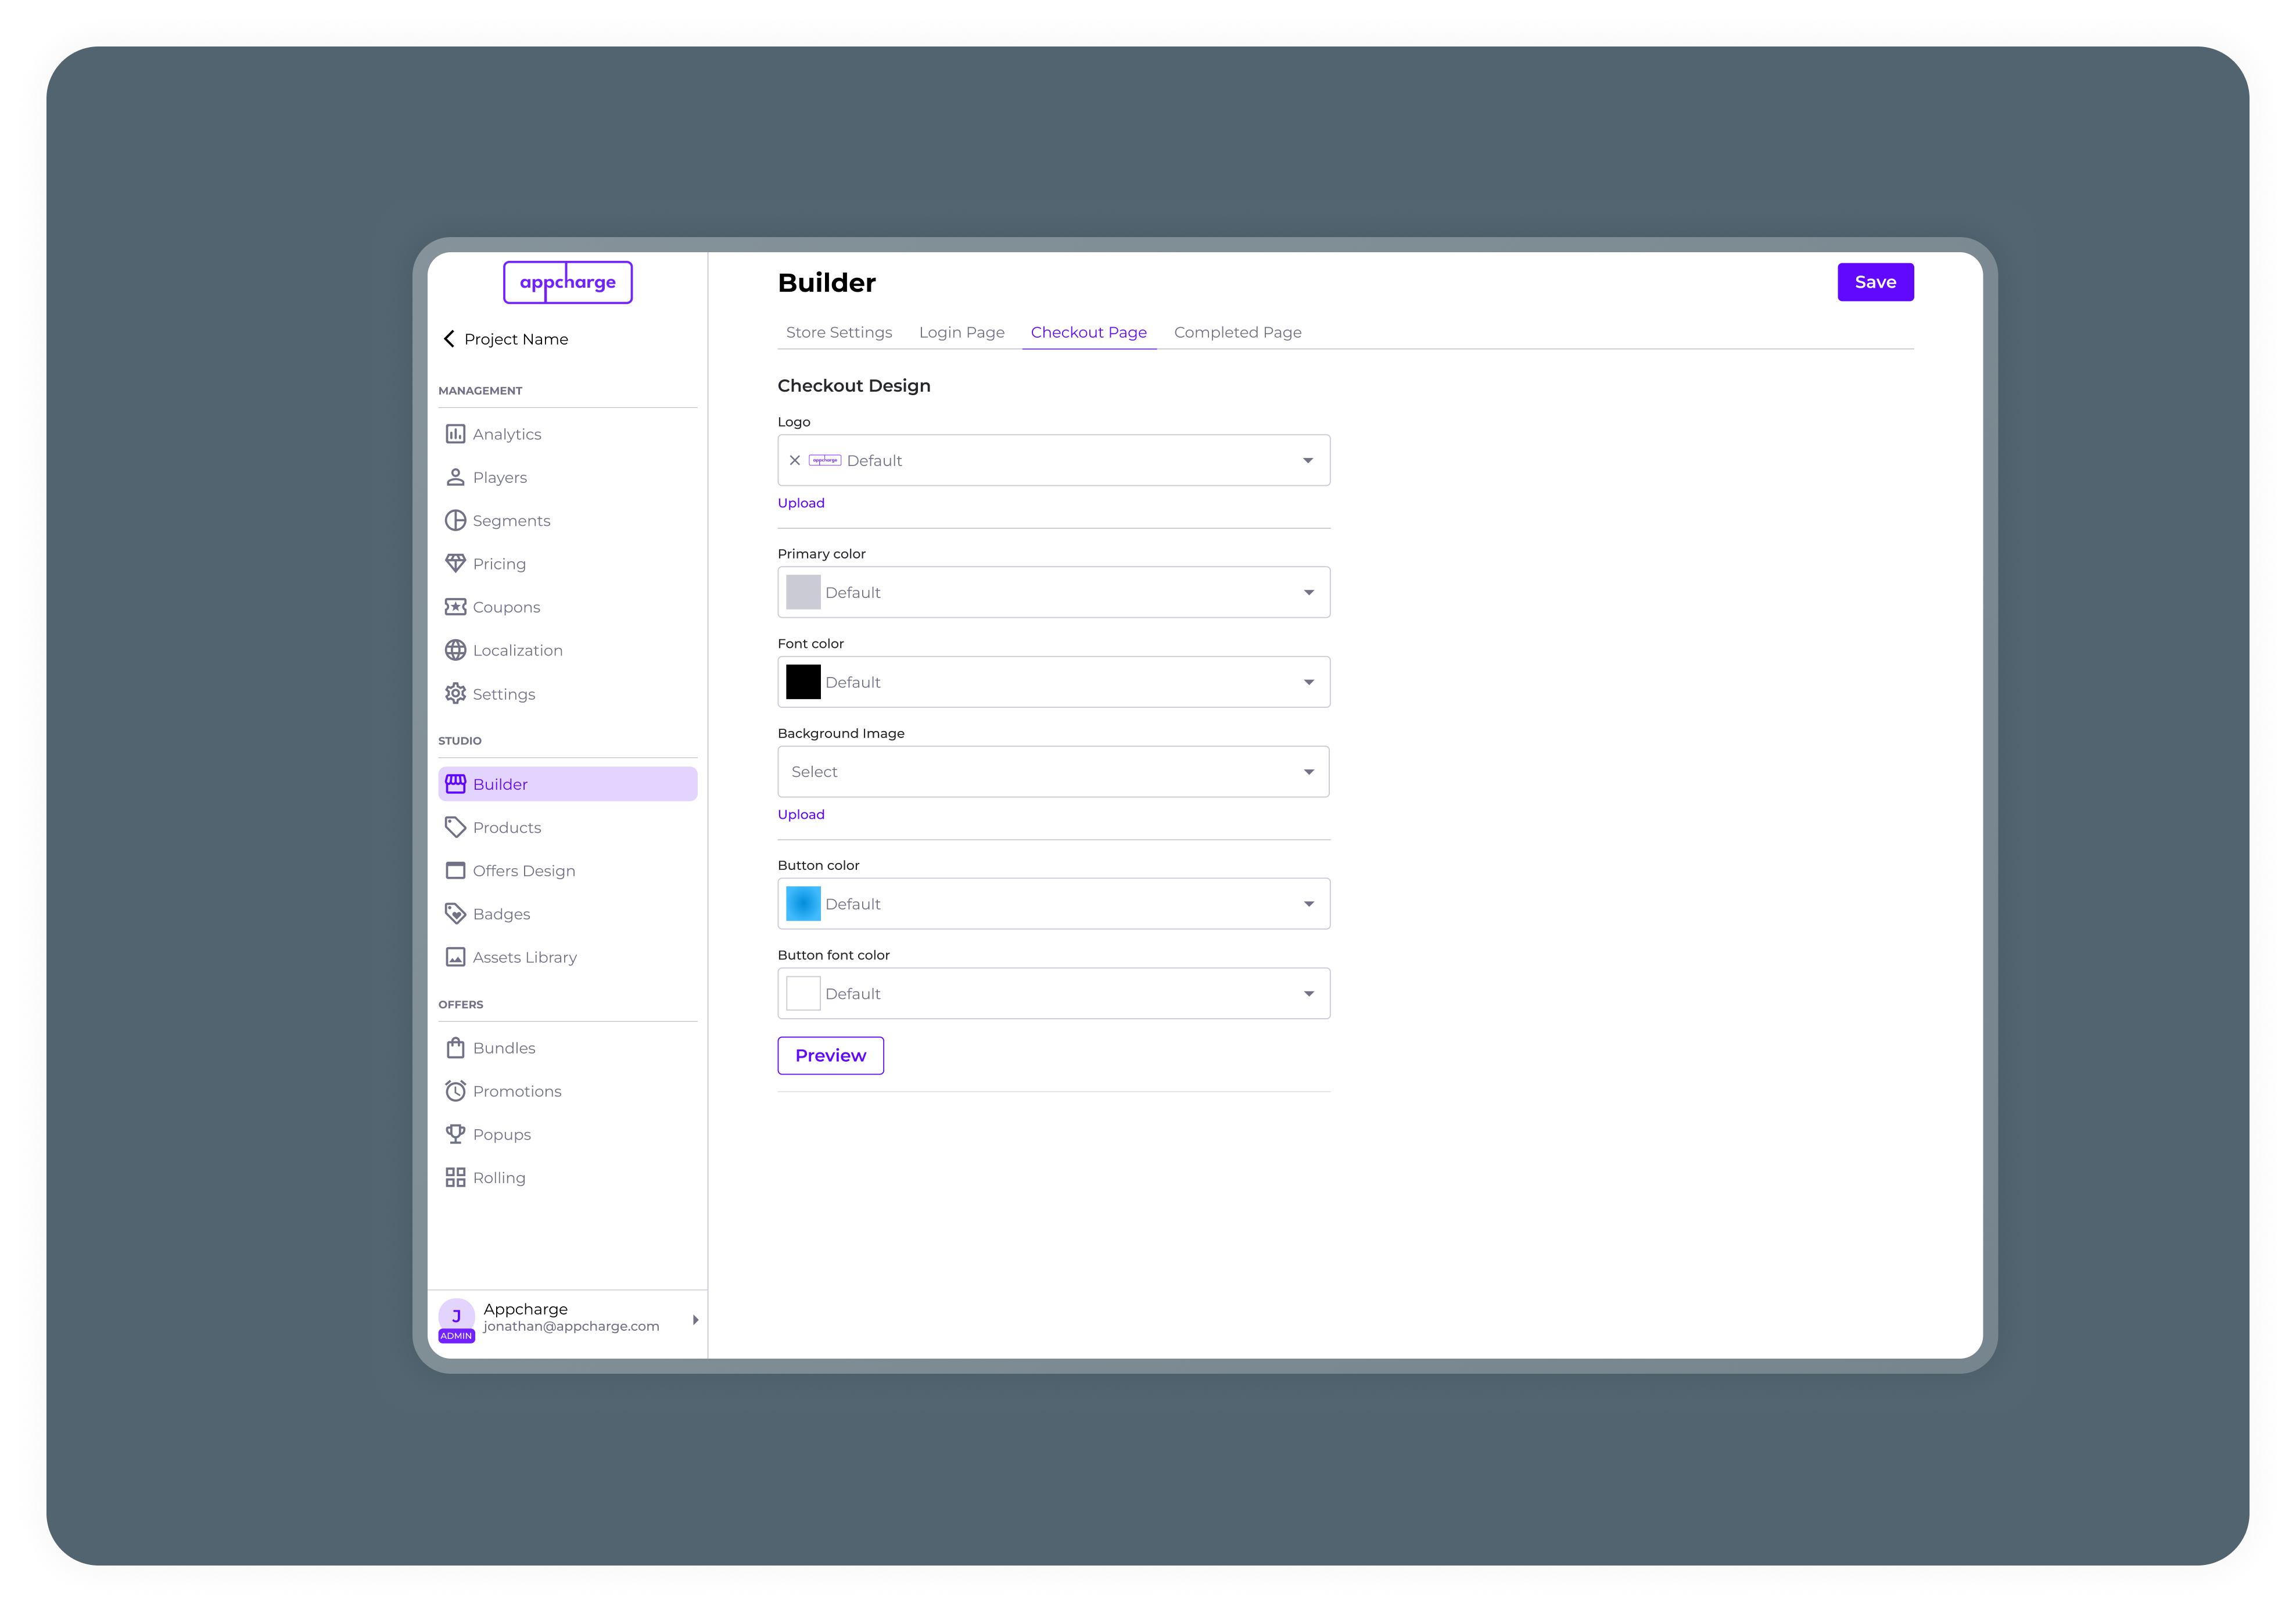
Checkout Design Fields:
- Logo: Specifies the logo displayed at the top of the checkout page.
- Primary Color: Defines the primary accent color used for key elements like buttons or highlighted sections on the checkout page.
- Font Color: Sets the color of the text displayed across the checkout interface.
- Background Image: Determines the background image for the checkout page.
- Background Image (Mobile): Allows a separate background image to be uploaded for the mobile version of the checkout page, ensuring better optimization for smaller screens.
- Button Color: Configures the color of interactive buttons within the checkout interface, such as the payment button.
- Button Font Color: Sets the font color for text inside buttons to enhance contrast and visibility.
Once you have configured your checkout settings, proceed to the next step in the integration process. For detailed instructions, refer to the Frontend SDKs documentation.
Updated 5 months ago