Manage User Roles
Multi-Project User Access:
- Users can be added to more than one project, allowing them access based on the roles assigned.
- Each project within a company can have one or several admins.
- Admins have the authority to add users, assign roles, and manage access across the projects they oversee.
- Users can have different roles and permissions in each project they are included in.
Roles and Permissions
Here is a table summarizing the roles and permissions within the Company Dashboard. The rows represent the permissions, while the columns correspond to the roles.
| Permission | Role | Admin | Developer | Project owner | Operations/Editor | Finance | Support |
|---|---|---|---|---|---|---|
| Company | Update details + View | Update details + View | Update details + View | None | None | None |
| Users | Manage | None | None | None | None | None |
| Integration | Manage | Manage | Manage | None | None | None |
| Authentication | Manage | Manage | Manage | None | None | None |
| Orders | Refund + View | None | Refund + View | None | Refund + View | Refund + View |
| Evidence | Submit + View | None | Submit + View | None | Submit + View | Submit + View |
| Financial Report | Generate + View | None | Generate + View | None | Generate + View | None |
| Payouts | View | None | View | None | View | None |
| Analytics | View | None | View | None | View | None |
| Builder | Manage | Manage | Manage | None | None | None |
| Pricing | Manage | Manage | Manage | Manage | None | None |
| Asset library | Manage | Manage | Manage | Manage | None | None |
| Offers | Manage | Manage | Manage | Manage | None | View |
| Offer Design | Manage | Manage | Manage | Manage | None | View |
| Bundles | Manage | Manage | Manage | Manage | None | View |
| Promotions | Manage | Manage | Manage | Manage | None | View |
| Popups | Manage | Manage | Manage | Manage | None | View |
| Products | Manage | Manage | Manage | Manage | None | View |
| Badges | Manage | Manage | Manage | Manage | None | View |
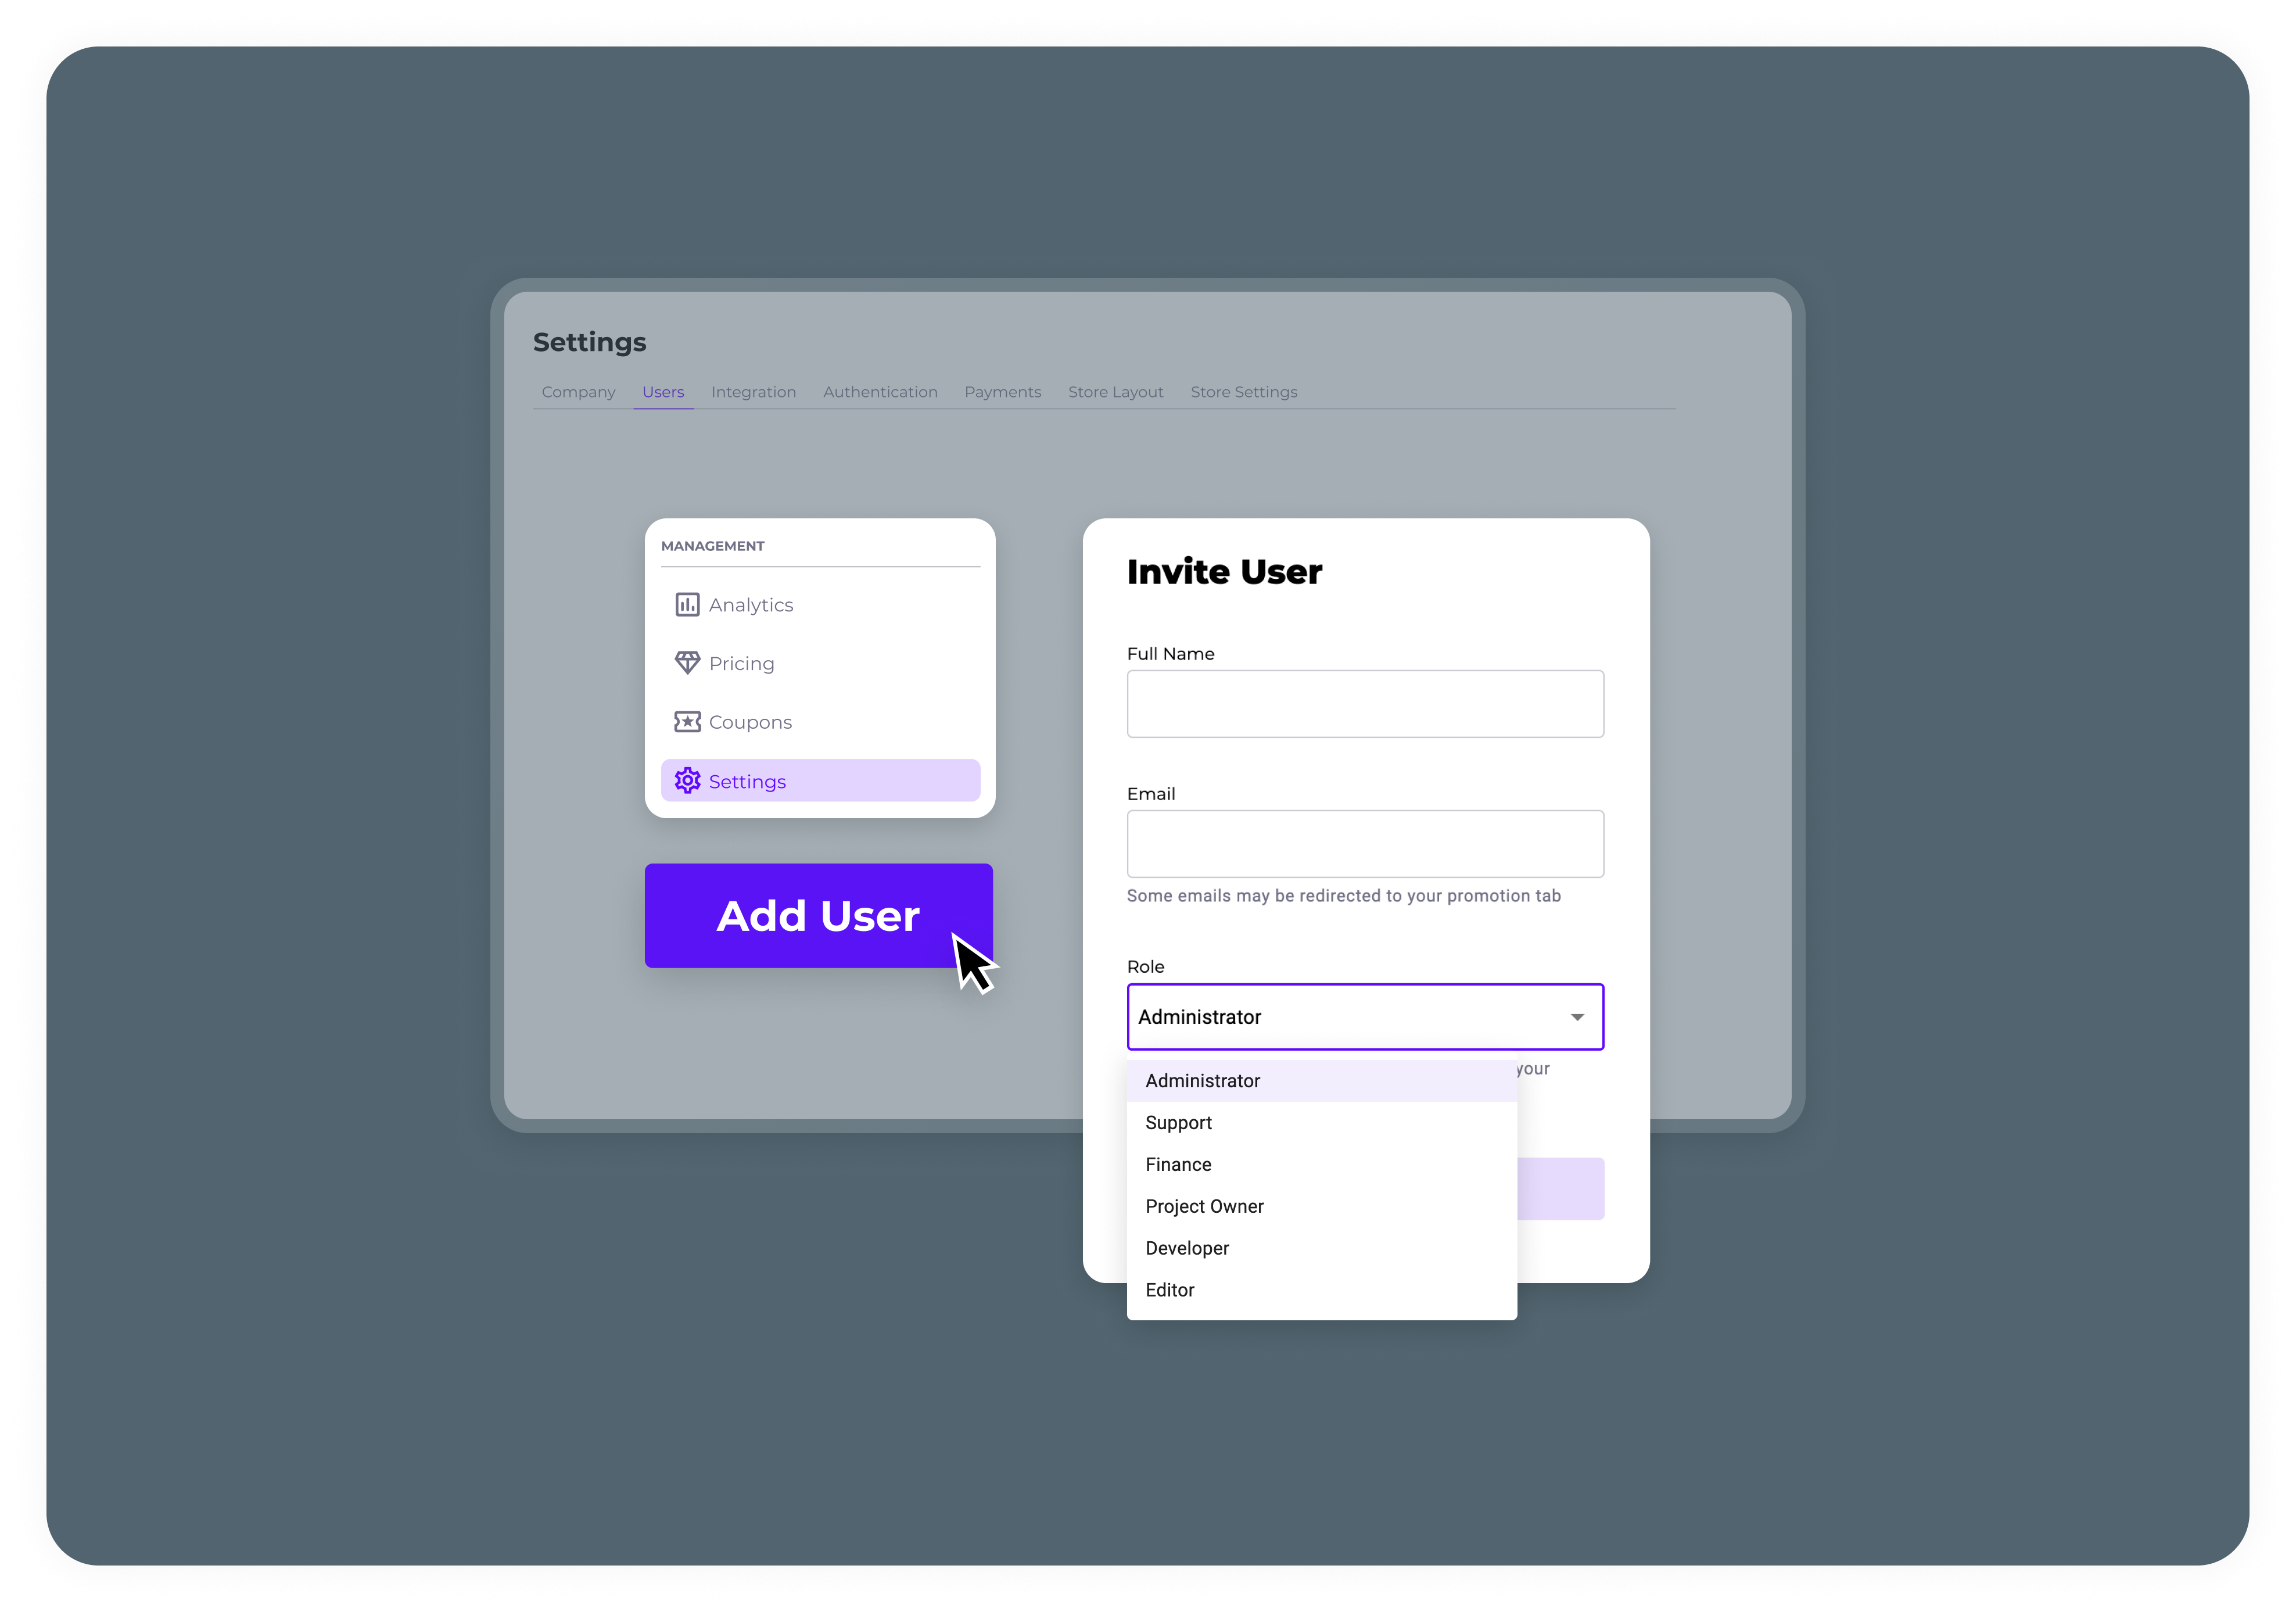
Adding a New User
Note: Only users with admin privileges can add new users to the dashboard.
Follow these steps to add a new user to the dashboard:
- Open the Appcharge company dashboard.
- Select the project to which you want to add the user.
- Click on the ‘Settings’ tab.
- Go to ‘Users’ in the top menu.
- Click ‘Add User’.
- Fill out the full name and email address of the user you want to add and assign them a role.
- Send Invite.
Once you have sent the invite, the user will be able to approve their new role via the email they receive from Appcharge.

Delete a User
Note: Only users with admin privileges can remove users from the dashboard.
Follow these steps to remove a user to the dashboard:
- Open the Appcharge company dashboard.
- Choose the project from which you want to remove the user.
- Click on the ‘Settings’ tab.
- Go to ‘Users’ in the top menu.
- To the right of the user you want to remove, click on the three dots.
- Select 'Delete'.
- Confirm the deletion to remove the user permanently.
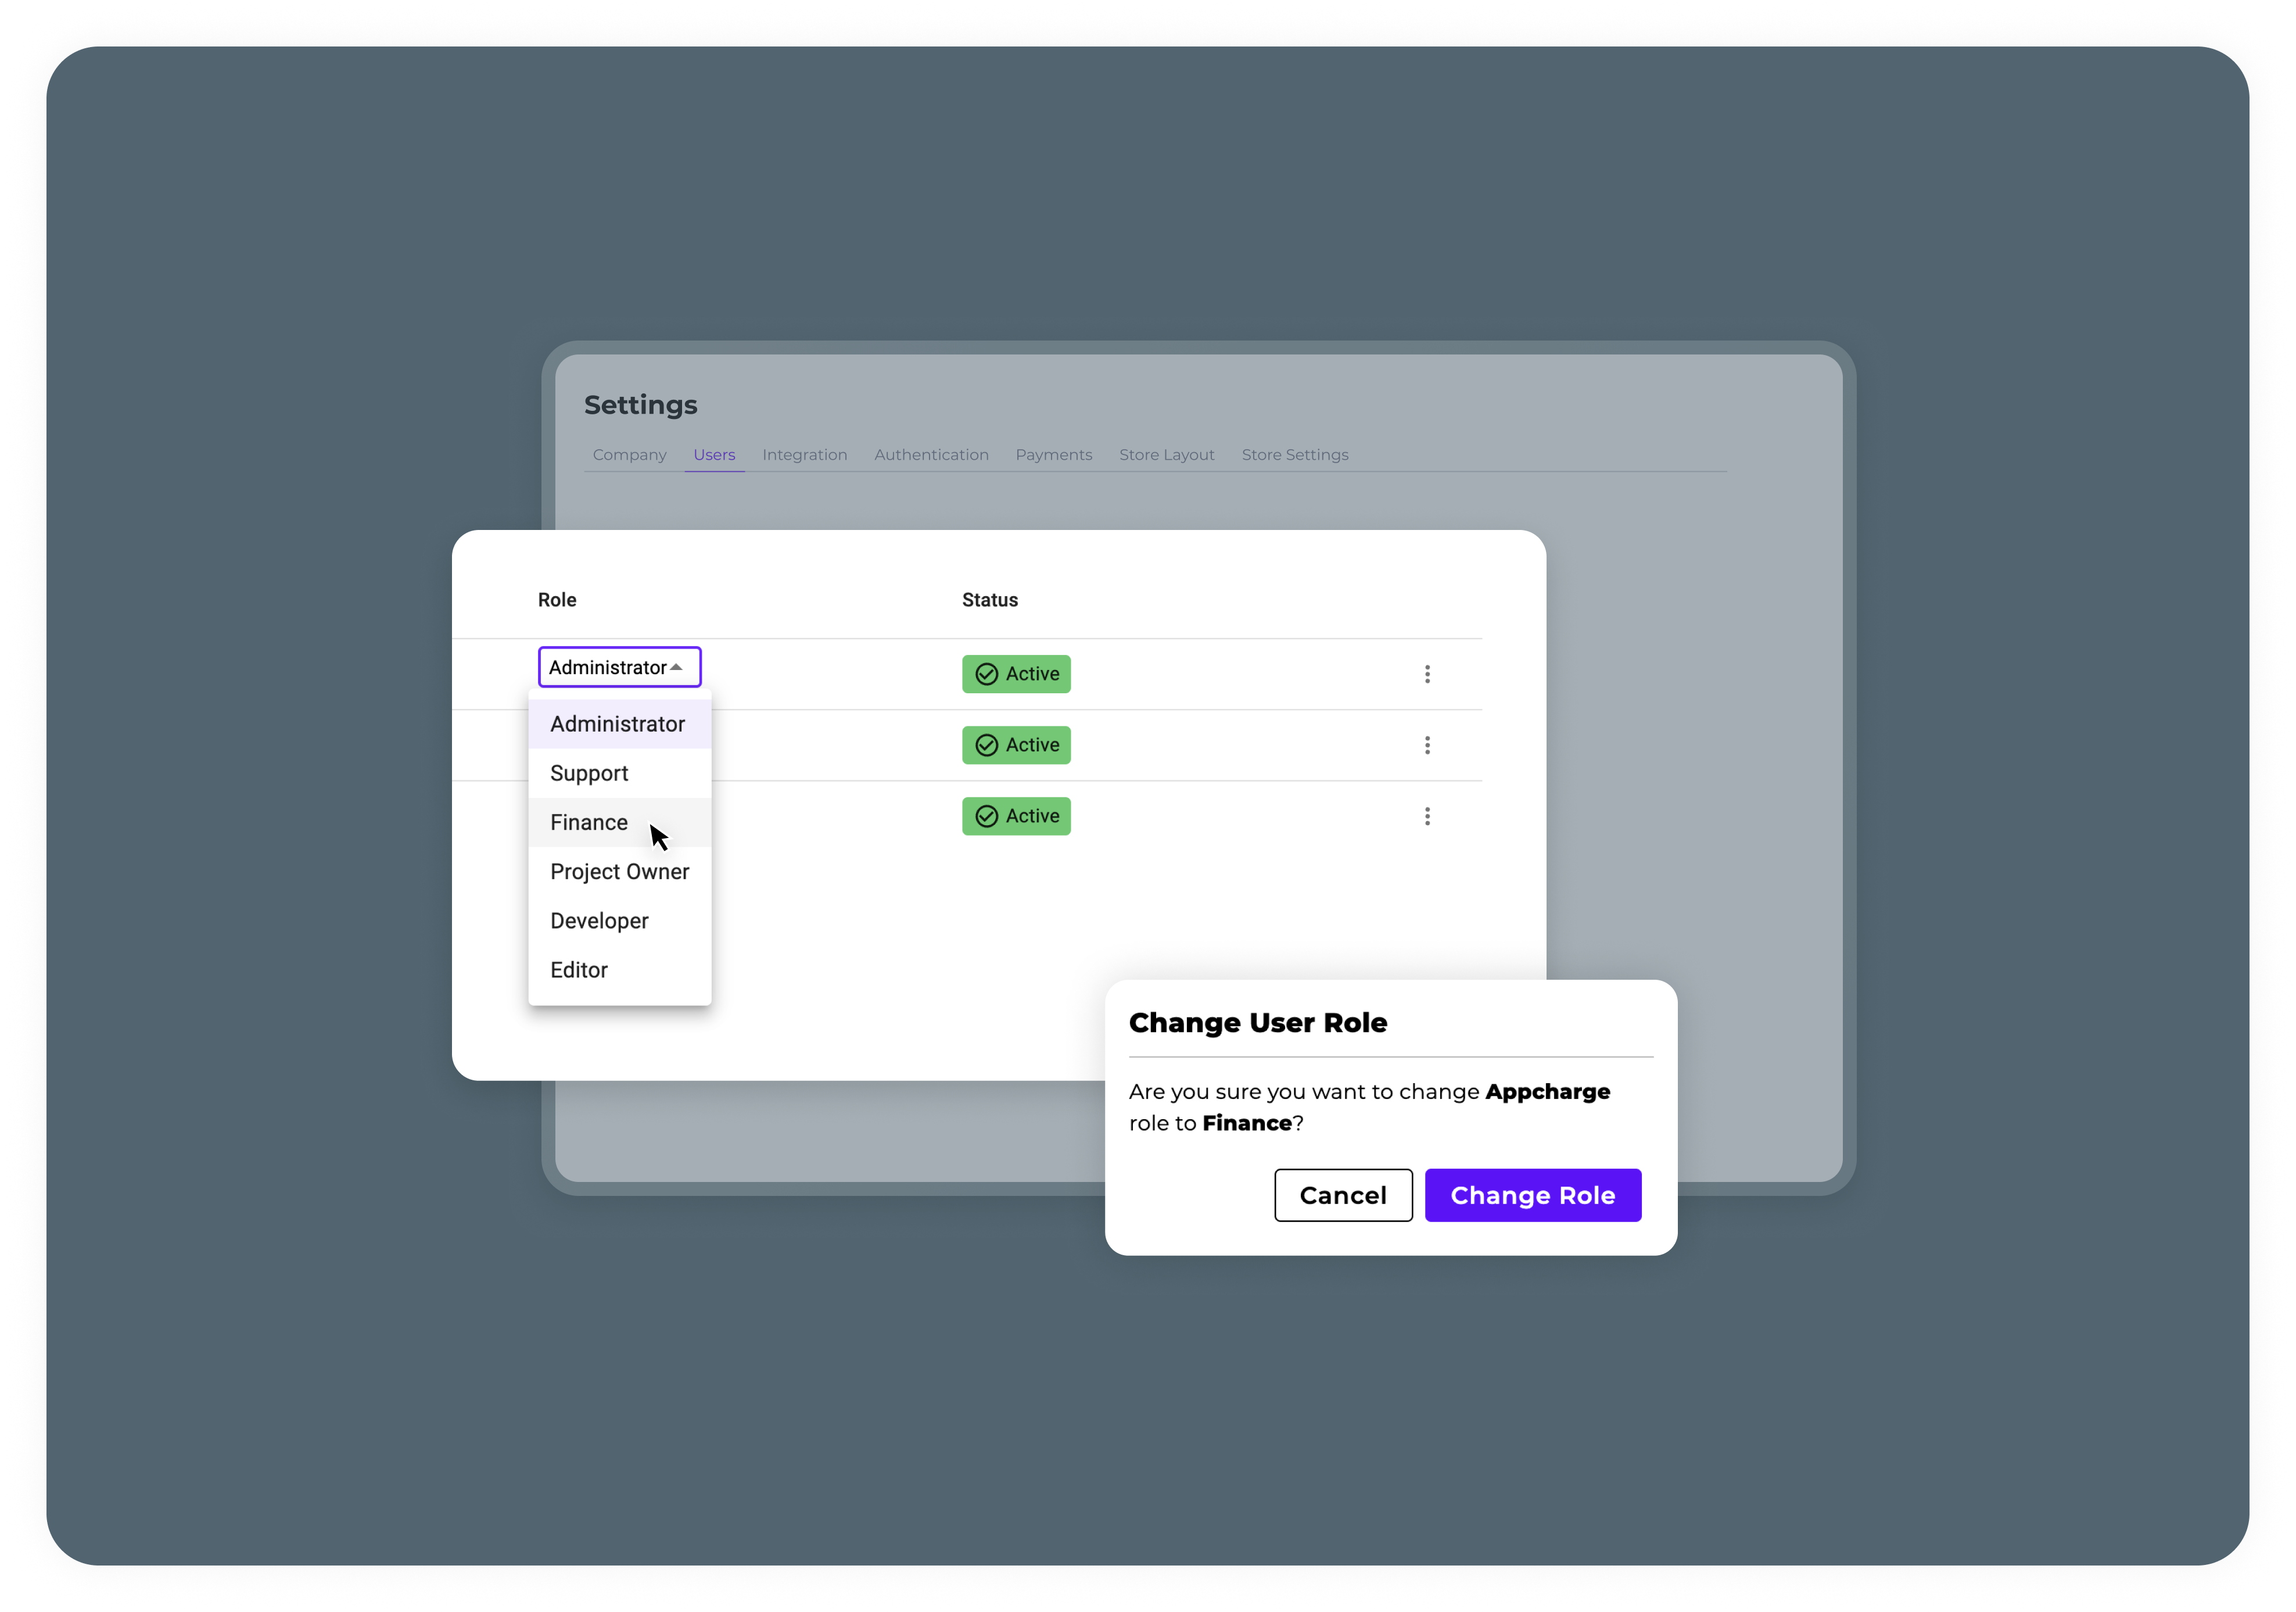
Edit a User's Role
Note: Only users with admin privileges can edit a user's role in the dashboard.
Follow these steps to edit a user's role:
- Find the user you want to edit.
- Click on their current role to present a drop-down menu of all roles.
- Select the role you want to assign to this user.
- Confirm the changes by clicking 'Change Role'.

Updated 5 months ago
