
Products
Products represent the items or features that are offered to players through various offers, such as bundles, special offers, or popups. These products define what players can see in the offers and ultimately what they can purchase. Products can be virtual goods, time-based offers, or any item you wish to sell within your game or app. Configuring these products correctly ensures they are presented as intended within different offer formats.
When setting up products, assets (such as images) are associated with them to visually represent what is being offered. There are two ways to upload assets when configuring products:
- Via the "Add New Product" page: You can upload an asset directly while creating a new product. Once the product is saved, the asset will automatically be stored in the Assets Library. However, the ID of the asset will be automatically set as the name of the file you upload, and you won’t be able to change the ID later.
- Via the "Assets Library" page: If you want control over the asset ID, you need to upload the asset to the Assets Library before creating the product. This allows you to assign a custom ID and categorize the asset before it’s linked to a product.
Note: Uploading the asset to the Assets Library beforehand is a prerequisite if you want control over the asset ID during product creation.
Uploading Assets via the Assets Library
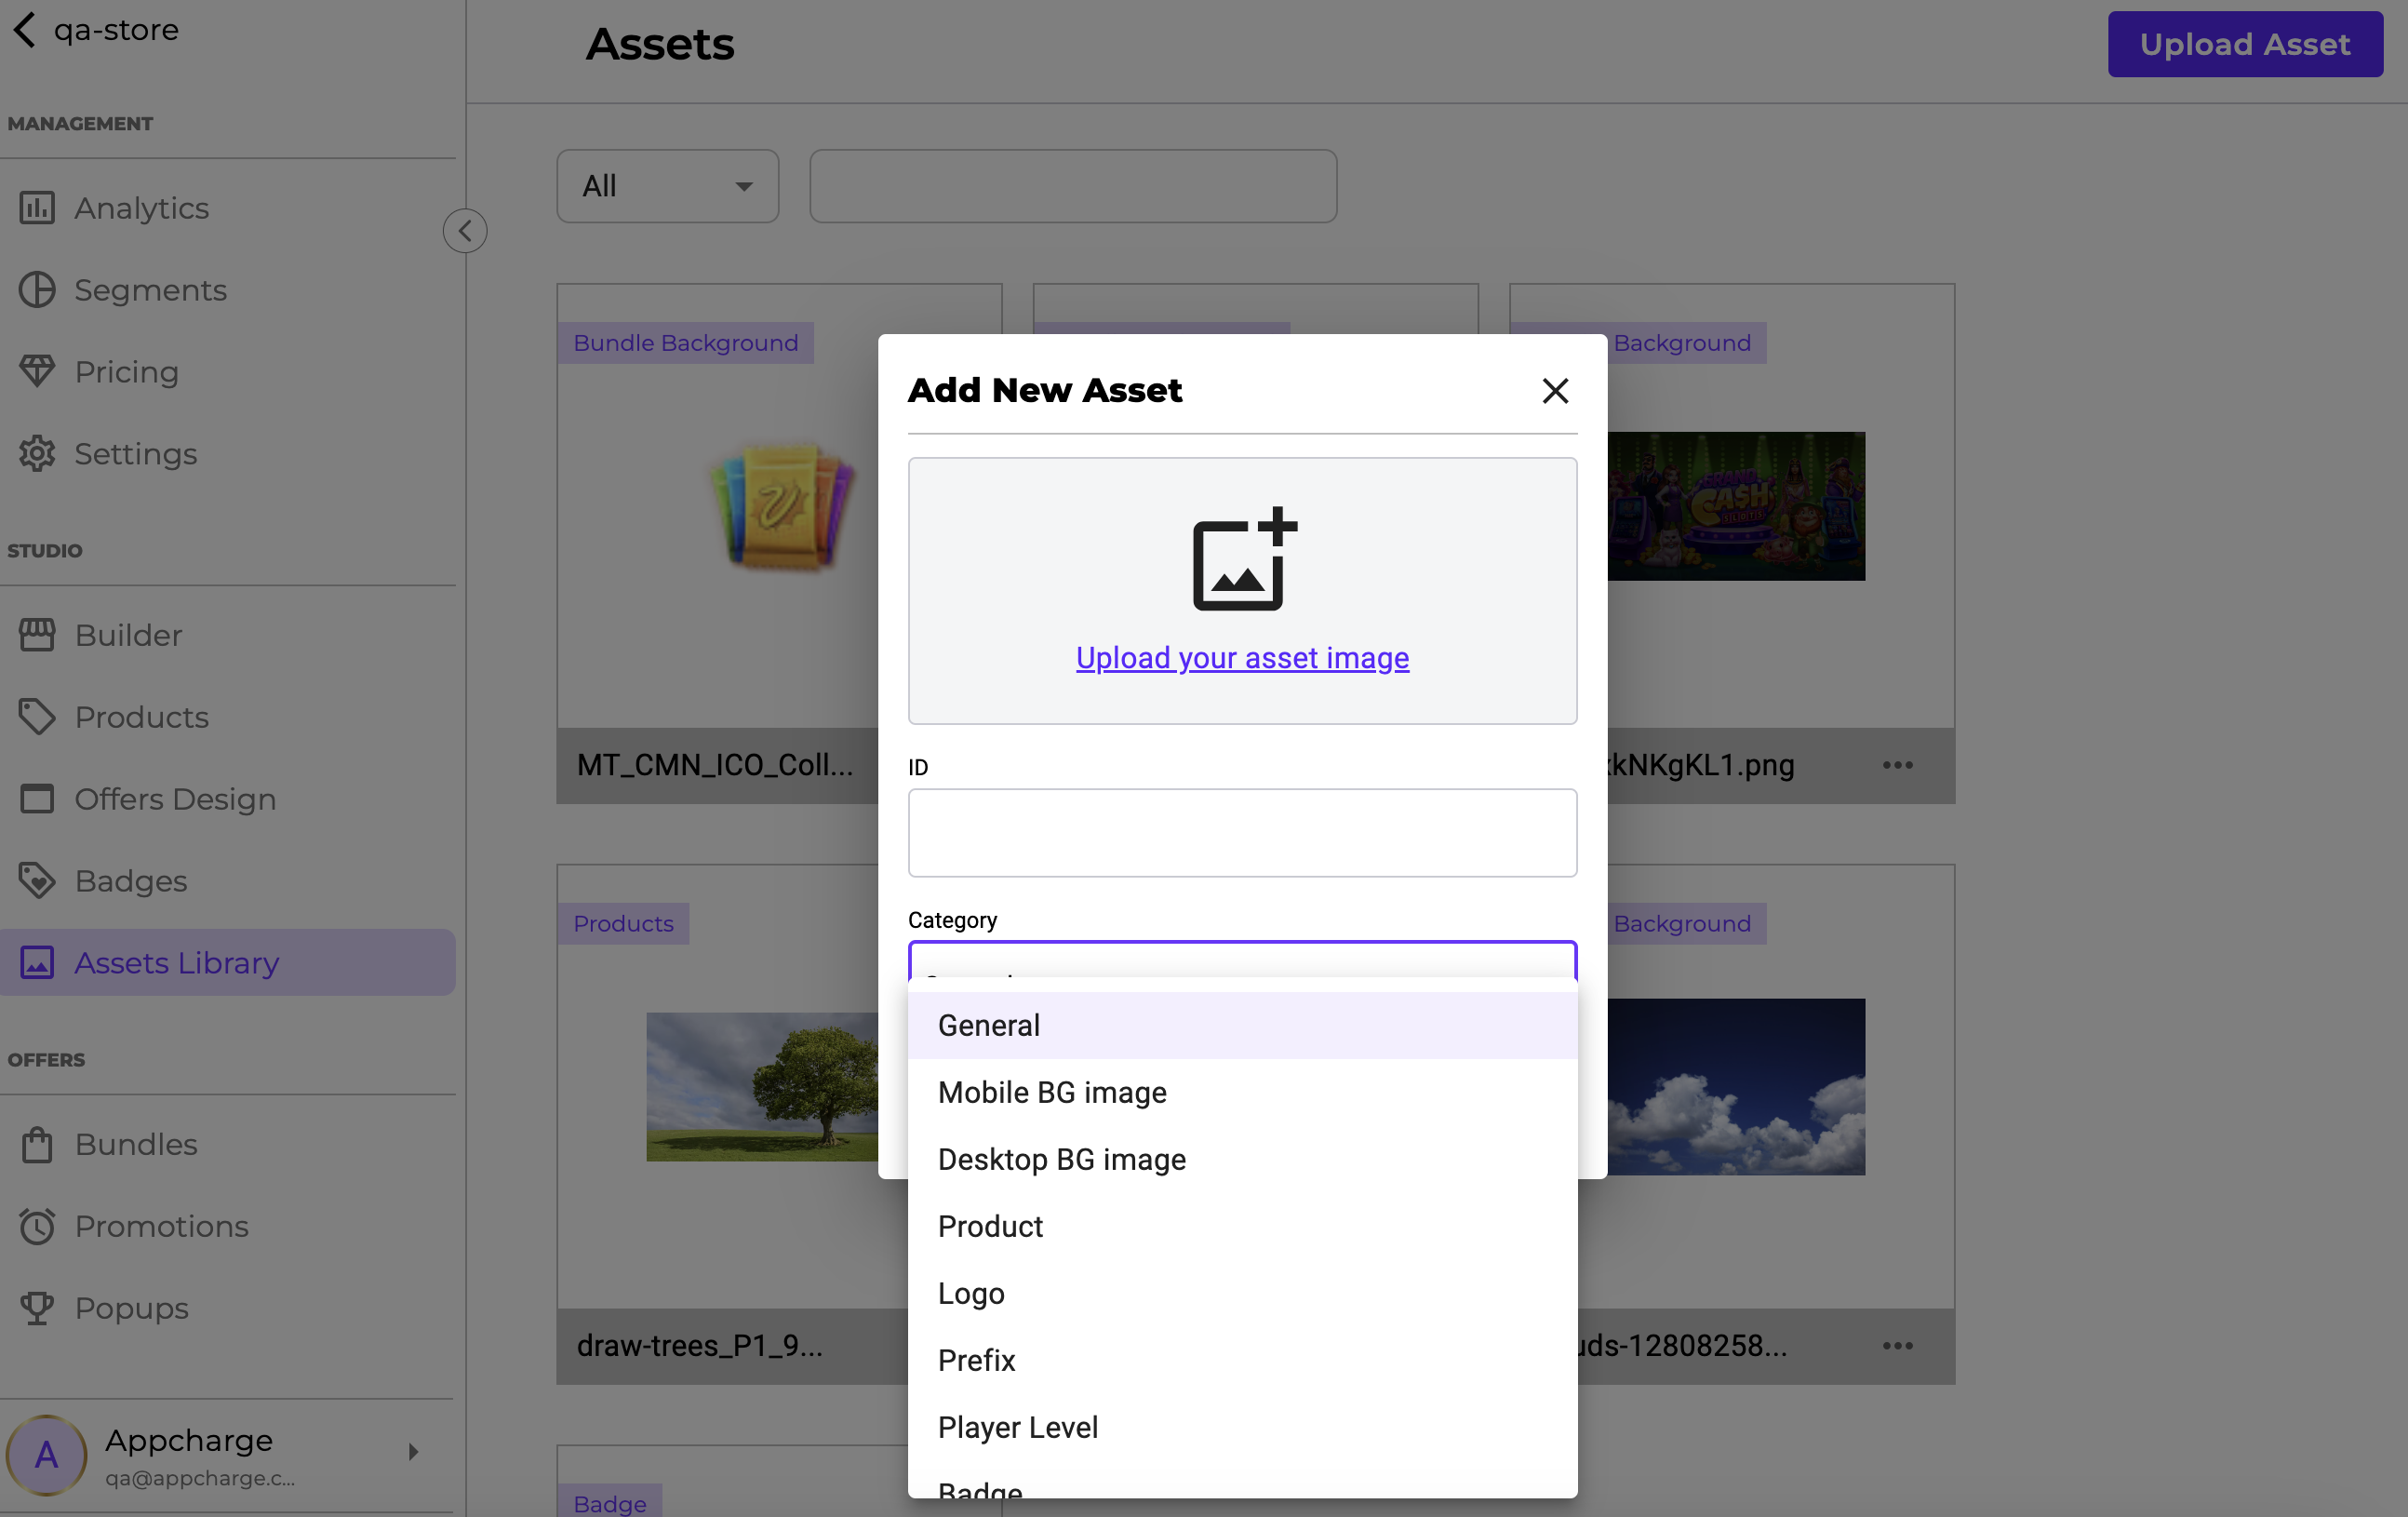
If you want to assign a specific ID to the product asset before using it, follow these steps to upload it via the Assets Library:
- Navigate to the Assets Library tab in the Appcharge dashboard.
- Click “Upload Asset” at the top right.
- In the Add New Asset popup, upload your product image by clicking on the upload icon.
- Enter an ID for the asset and choose "Product" from the Category dropdown.
Note: This image will be associated with the product you are configuring. - Click Save to add the asset to your library.
Once you have uploaded the image to the Assets Library, you can use it when configuring or editing your products in the Products tab.
Configuring Products in the Dashboard
To configure products in the dashboard, follow the steps below:
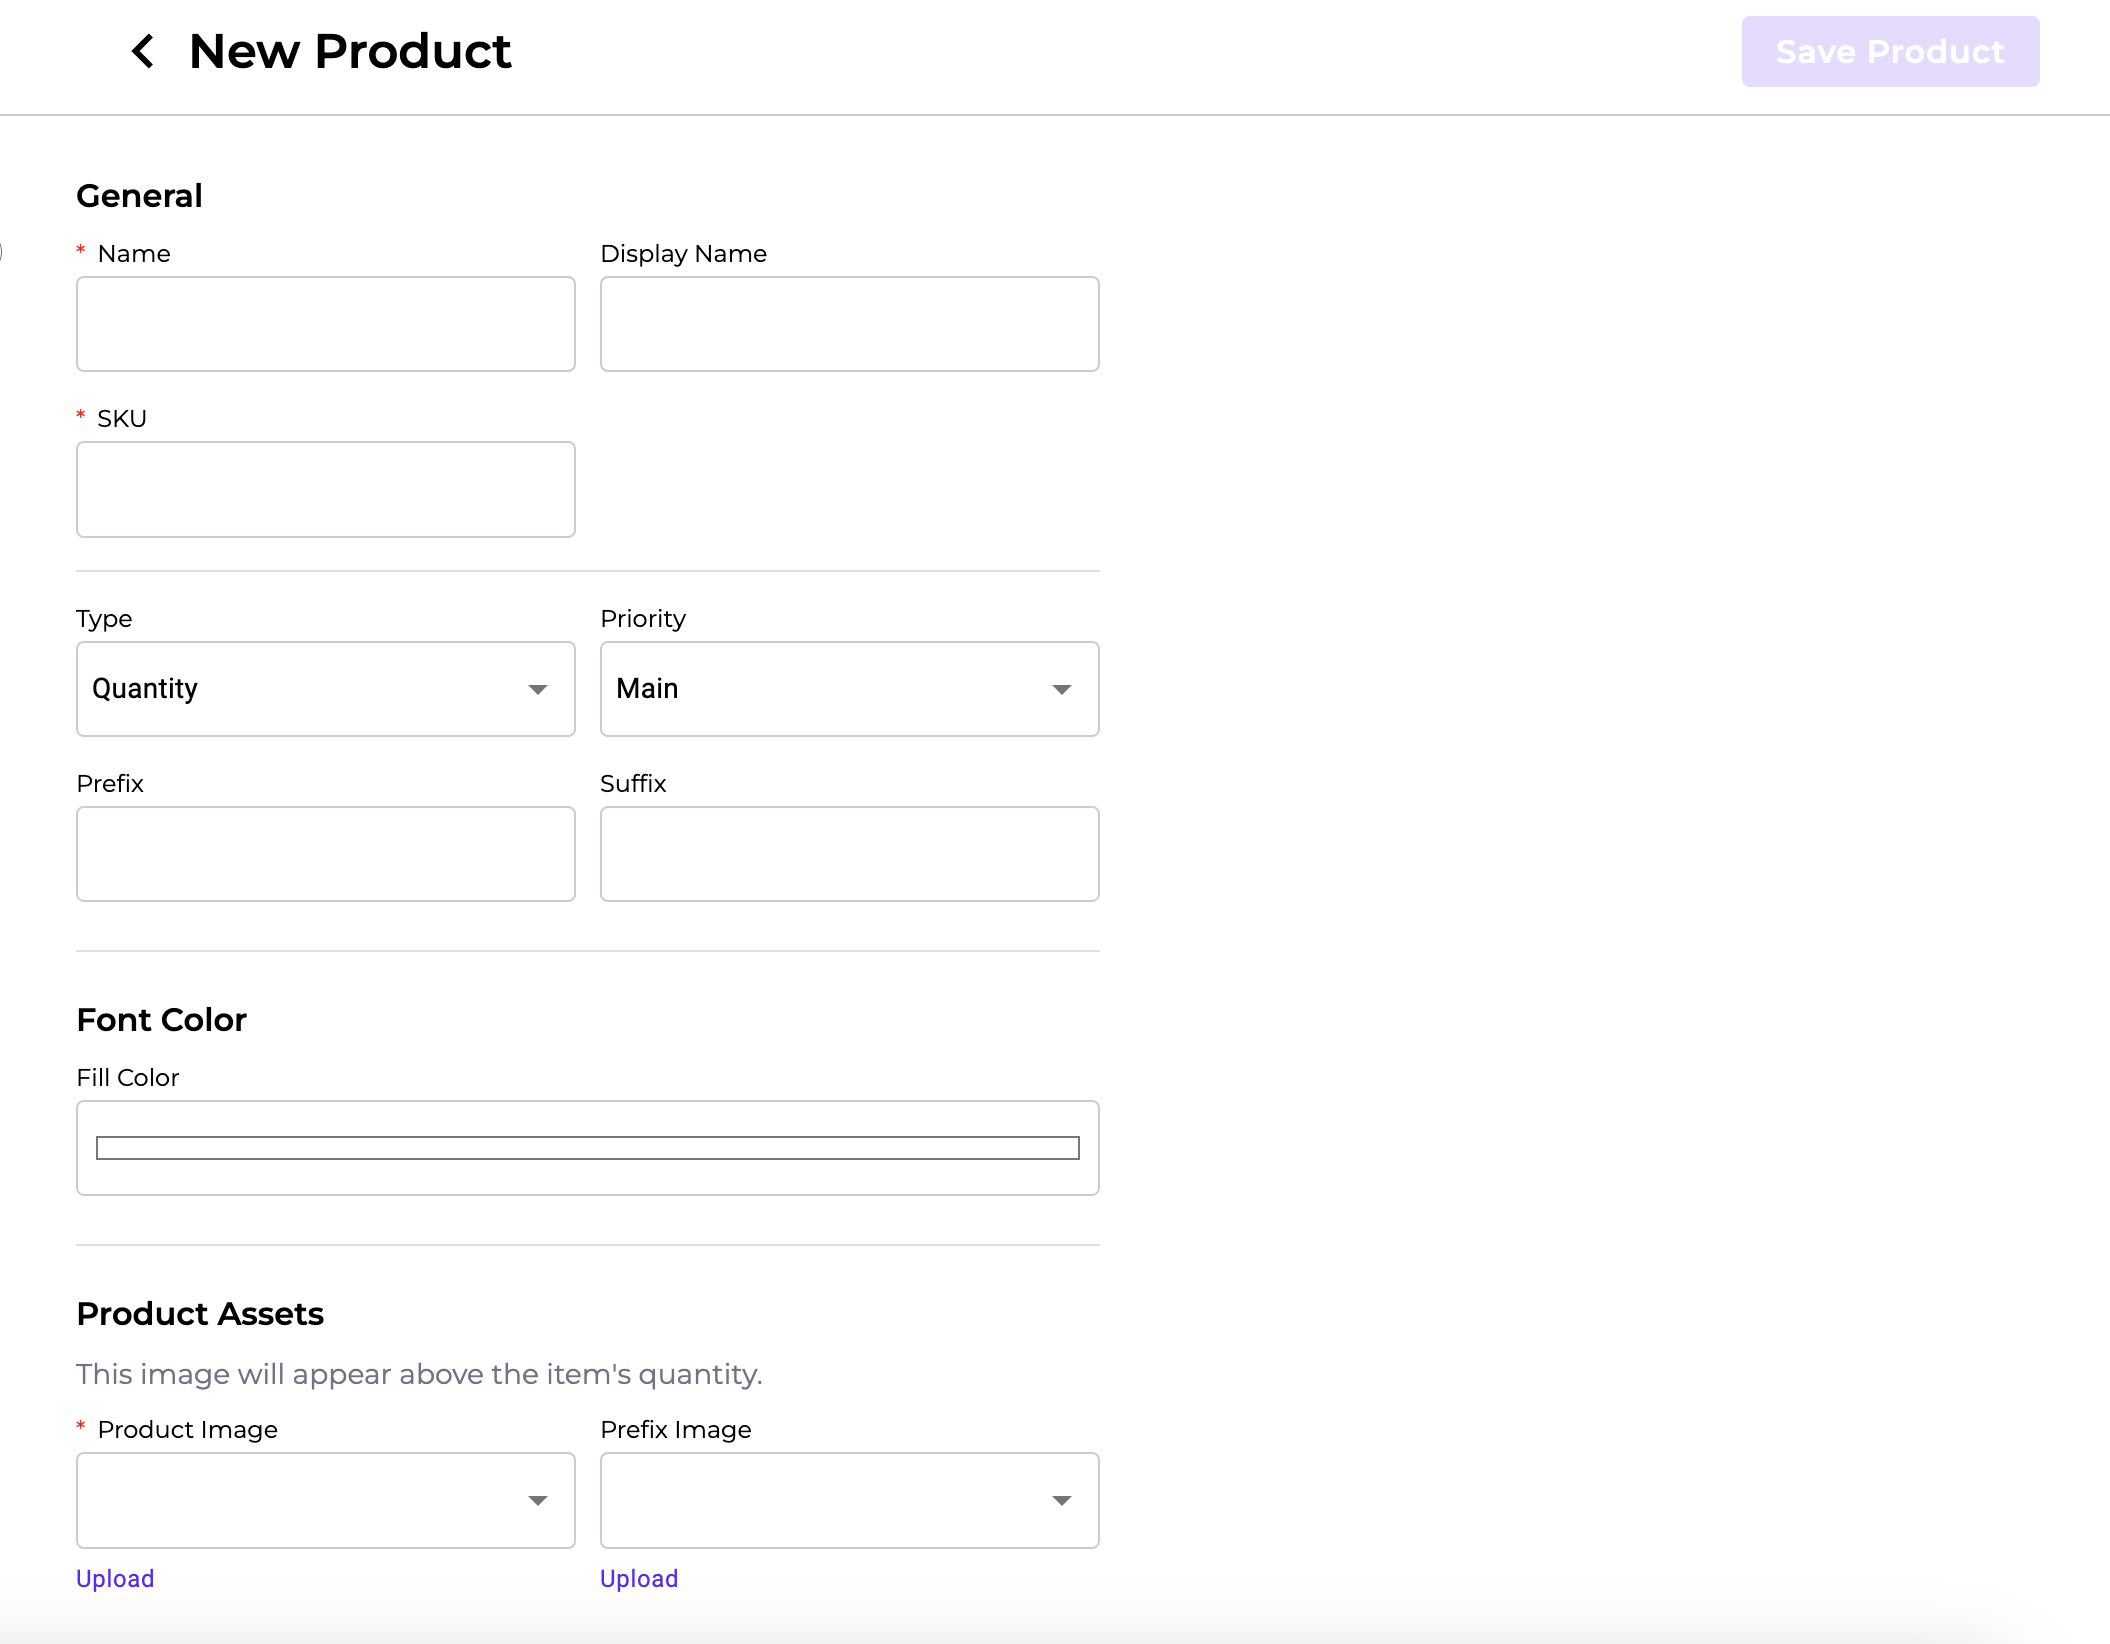
- 'Products' Tab: Navigate to the 'Products' tab in the Appcharge dashboard.
- Add a New Product: Click on the 'Add New Product' button to create a new product.
- General Settings: Enter the required details such as:
- Name: The product's internal name.
- Display Name: The name displayed to the user.
- SKU: The product’s Stock Keeping Unit identifier.
- Type: Choose between Quantity-based or Time-based products.
- Priority: Set the product's priority as Main or Sub.
- Font Color: Select the fill color from the palette.
- Prefix/Suffix: Add any prefixes or suffixes for the product's display.
- Font color: choose a fill color from the palet
- Products assets: Upload a Product Image and Prefix Image, or select one that you have already uploaded to the Assets Library and configured as a product.
Note: The product image appears above the item’s quantity in offers. - Save the product: Click Save.
Note: If you upload an asset here, it will automatically be saved to the Assets Library, but you will not be able to change its ID afterward.
Updated about 18 hours ago